The full process for air conditioning shirt to DIY
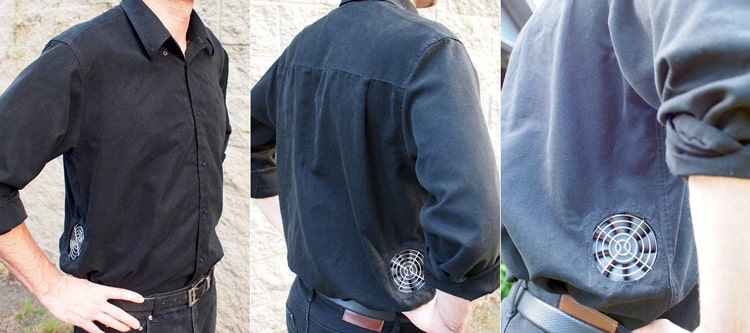
The air conditioning shirt will keep you cool, perfect for those long, hot summer days working outdoors. This air conditioning shirt has two fans mounted on either side near the back of the shirt to blow cold air out from underneath the shirt and through the collar and cuff openings for full body relief. If you are also interested, follow my steps to DIY an air conditioning shirt.
Step 1: Tools + consumables
Tools.
Hobby knife
Indelible mark
Scissors
Needle + tread
Fabric chalk or pencil
Soldering iron
Heat shrink tubing
Epoxy resin for plastic and metal
Hammer
Consumables:
2x 12V batteries
1 battery holder
2x 4" computer fan
2x 4" fan guard
1x SPDT switch
Formal shirt
Button snaps
Thin semi-rigid scrap plastic sheet
Ties
Step 2: Create a fan support for the shirt
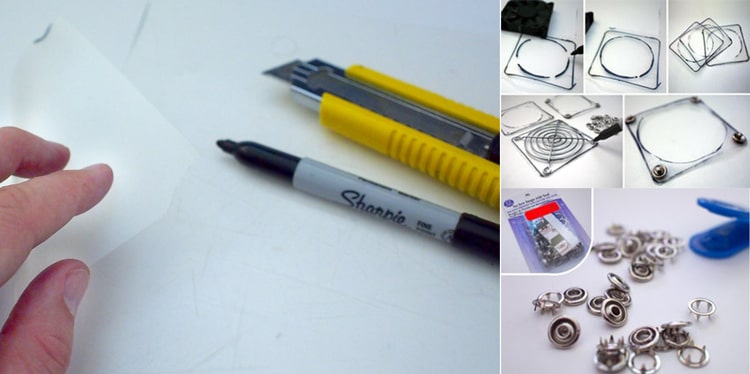
To hold the fan neatly inside the formal shirt, support is needed. I chose a thin cutting board and used a marker to trace the outer edge of the fan shroud into the thin scrap plastic.
Then, place the tip of the marker between the fan blades and trace along the inner edge of the fan shroud.
Using a hobby knife or scissors to cut out the shape, adjust your cutout by about 2 mm , using the fan shroud as a guide, place the fan shroud in the center of the traced outline and mark the four corners where the fan shroud eyelets will meet the scrap plastic.
Push button snap
Most button snaps have a top snap and a bottom snap that are secured to the fabric using a toothed washer that clips from the other side. The other washer on the top and bottom is the same, and my button snap comes with a plastic fastening device that presses the toothed washer into one side.
Line up a corner marker on the waste plastic between the upper or lower snap fastener and the toothed snap fastener. Place the snap-on plastic toothed washer sandwich into the plastic fastening device and hit it hard with a hammer to make the button snap. Repeat for each corner for all plastic cuts you make, making sure to use the same upper or lower snap for all scrap plastic cuts on the same side of the scrap plastic.
When finished, I have four identical cuts with the snap buttons all facing the same direction. These will be the supports that attach to the inside of the garment to hold the fan assembly in place.
Step 3: Install the support on the shirt
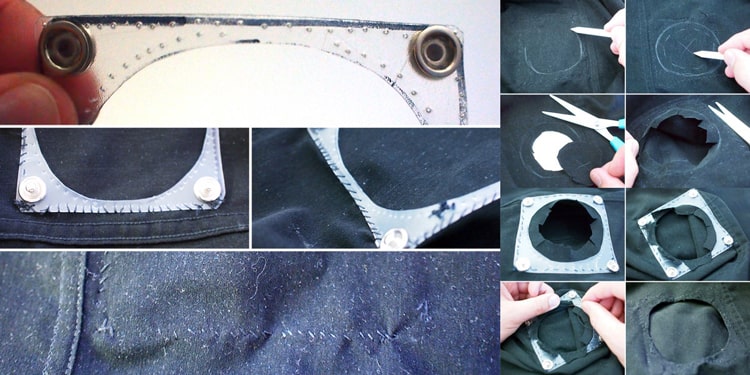
Wanting to attach the plastic supports to the fabric more easily, I decided to use a sharp tool to perforate my plastic around the perimeter, and along one edge of the plastic support in the shirt's side seam lining, I began sewing the outer edge of the plastic support to the inside of the shirt, sewing only the outer edge, leaving the inner circle for now.
Turning the shirt right side out and laying it flat on the table, I used a fabric pencil to outline the circles on each plastic support. These openings in the fabric are for the fan intake. I traced another circular illustration from the first pencil mark, about 10 mm from the first pencil mark, which would be where the fabric was cut.
After removing a small piece of the circular fabric, small radial cuts, about 10 each, were made from the inside of each circle. These radial cuts will allow the flaps to be folded back and neatly stitched into place using the perforated inner edges of the plastic holder.
Step 4: Make the fan assembly
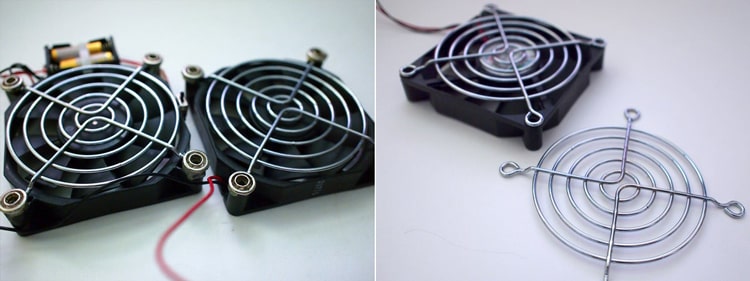
First determine the direction of airflow through the fan. The fan cover should be placed on the intake side of the fan to prevent objects from being inserted into the blades. The opposing button snaps for the plastic holder will be located at the top of each corner eyelet of the fan shroud.
Use an epoxy rated for use on plastic and metal. Most adhesives may not adhere to metal or some plastics, or the bond may break when the snap is inserted. Be sure to use the correct type of adhesive for bonding.
The fan cover is attached to the fan with the button stuck to each corner eyelet of the fan cover. Allow the epoxy to set completely.
When setting up, some epoxy oozed out from under the button snaps and prevented them from being inserted. I used a drill to remove all the blockage, and in hindsight, the alternative was to use the corresponding side of the button snaps instead of the side I show here, thus eliminating the need to drill holes after the epoxy had cured.
Step 5: Wiring
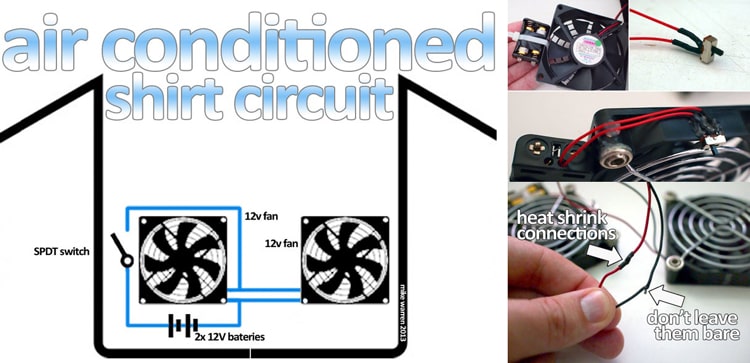
The two 12V fans are connected to a small SPDT switch on one of the fan covers and then to a 12V battery. I chose to place my switch in this position so that the fans can be operated by simply turning back with one hand and flipping the switch under your arm, right where the fabric opening is. The switch is wired and held in place with more metal and plastic epoxy.
I wanted to keep the battery accessible so I chose to secure it in place with zipper ties. If you choose this method, make sure you have enough clearance for the fan blades.
Finally, make sure to heat shrink all connections. Not only is this a good practice, it will be a good protective layer against human skin contact in this application. Considering the climate that these electronics are exposed to, heat shrink is perfect for this level of moisture.
Step 6: Wire Harness and Final Adjustment
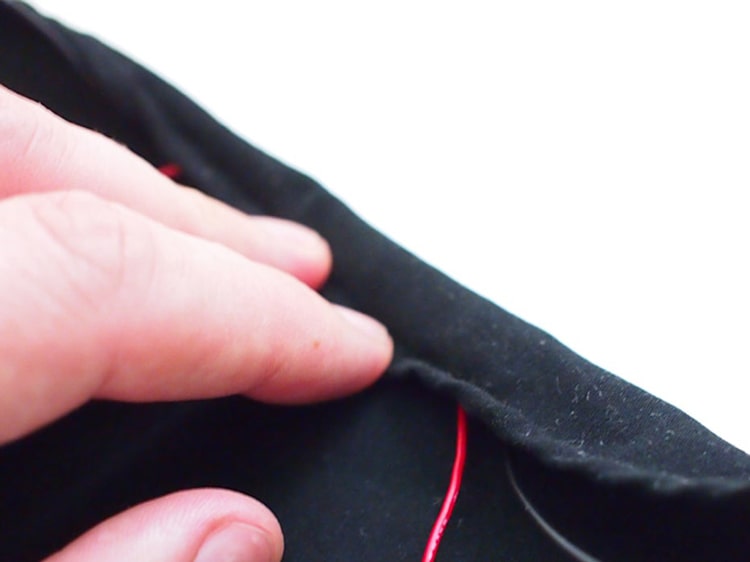
Most projects are complete and the fan assembly can snap into place. Depending on how many wires you stretch between the fans, you may need to make the harness out of fabric to keep it neat and comfortable. A simple sleeve can be sewn from scrap fabric to cover the wires and batteries.
I place the battery pack on the lower side under the fan where it will not interfere with the skin or inhibit movement, and the wires between the fans are trimmed to length but left with enough slack to allow for any stretching.
Step 7: Stay cool
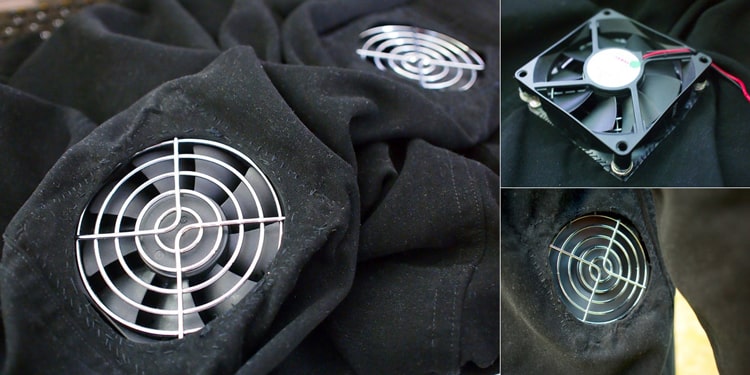
Equipped with two fans to prevent overheating, you'll be the coolest person in the office. The battery lasts about a week or more, depending on usage. Commercially available AC shirts can be charged via USB cable, so you may want to consider switching to another version.
The process will be tedious and need to test one's patience and hands-on ability. If you find it troublesome, you might consider choosing to buy a stylish and beautiful air conditioning jacket directly, but of course the price will definitely be more expensive than DIY.
